Texture Creation
description
A step by step on creating a rock/terrain texture.
keywords
rock, rocks, texture, textures, artificial, texture, textures.
Right chaps, here I'll take you through making an artifical rock texture in Photoshop 7.0, just like this.
I realise that it's normally better to create a texture from a photo of a cliff face, but this is a way of doing it without.
First off, Open up Photoshop and make a new document, sized 512 x 512.
Press D to default the colours you're using. Use the Paint Bucket Tool (G) and fill the space with black.
Go to Filter > Render > Difference Clouds and repeat the effect once more with Ctrl + F. Hopefully you'll end up with something like this:

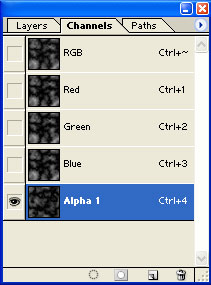
Right, now what we want is to go to the Layers window and click on the channels tab. Click on the arrow at the top right and click New Channel.... Leave the defaults and click OK. You should end up with this:
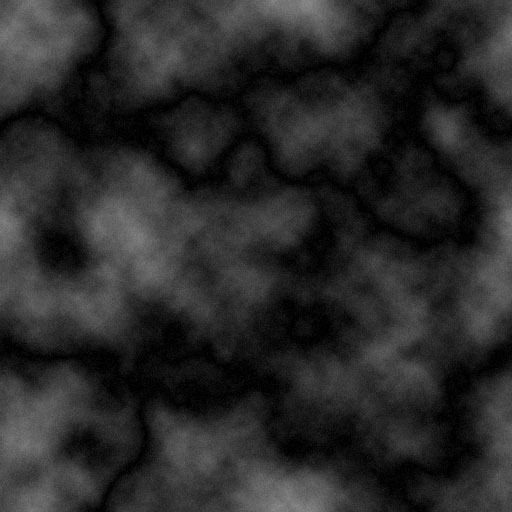
Now your window should have gone black. Press Ctrl + F twice to create the same effect as before. Now go to Filter > Noise > Add Noise.... Set the Amount to 1.5% and make sure Gaussian and Monochromatic are checked. Then click OK. You should have something like this:
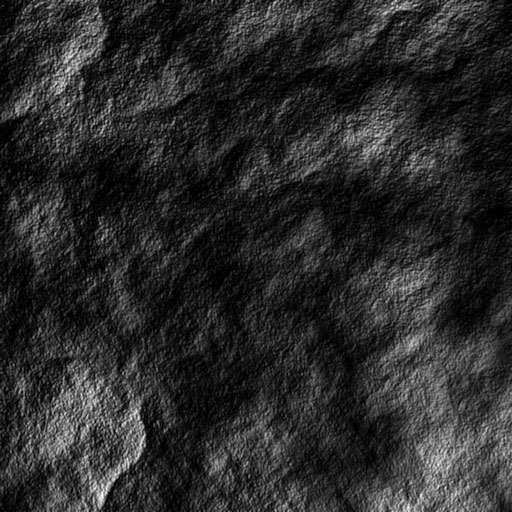
Now, click on the Layers tab and click on Layer 1 to select it. This will change your image to the previous difference clouds. Now go to Filter > Render > Lighting Effects and change your settings to match the screenshot below:
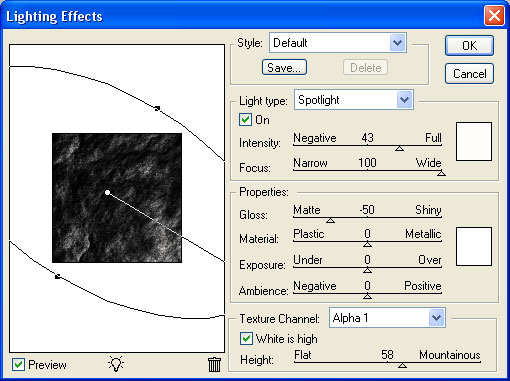
Be sure that the Texture Channel is set to Alpha 1, or whatever your custom channel was called. With that done correctly, you should be left with something like this:
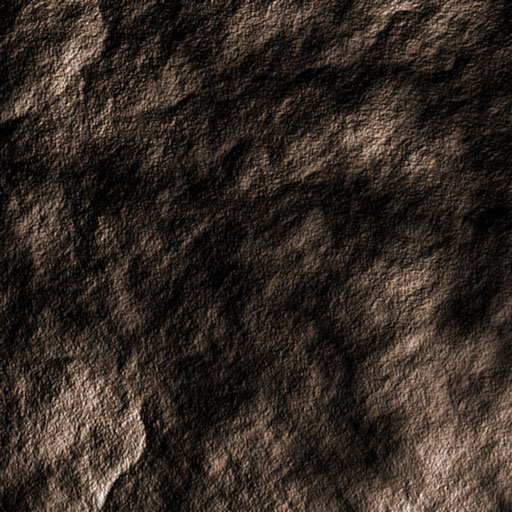
Right, nearly there. The last thing you might wanna do is colourize the image. Press Ctrl + U To open up the Hue and Saturation window. Make sure Colorize is checked, and then fiddle around with the Hue and the Saturation Bars.
For this tutorial I've used Hue: 25 and Saturation: 20. You should be left with something like this:
Now if you want, you can edit the image to make it seamless, and that's all there is to it guys.
AcX