General Half-Life 2/Scripting
description
Mastering gestures.
keywords
face, poser, faceposer, guide, part 3, part 4, gestures.
Tutorial Description
In this Tutorial, you'll learn about :
- NULL Gesture : Adding a NULL Gesture to prevent bugs with real Gestures
- Adding Gestures : Adding an existing Gesture to your scene
- Edit Gestures : Customize a Gesture to make it fit our need
- Blend a Gesture with another Animation : Play 2 Animations at the same time
Requirements :
- Faceposer Guide Part I : Setting up the workspace
- Faceposer Guide Part III : Getting your NPC actors to look and interact
Introduction
First off, a few words about what a Gesture really is. A Gesture is an animation. But an animation that doesn't override the NPC's current action. So it's easy to have a Gesture blend with a movement, a scripted_sequence and even another Gesture.
Note : More than one Gesture can be played at the same time on one NPC, they will simply blend with each other.
Most of the animations are Sequences. Sequences have a start, and end, and that's all. And all we can do with a Sequence is either make it go faster or slower.
Gestures are more advanced Sequences ; a Gesture is divided in 5 "parts", which can be manipulated independently.

Postures are made of 3 sequences put together ; generally the "Blend in", "Loop" and "Blend out" parts.
Note : Faceposer also refers to some animations as Postures. These are actually Gestures divided in only 3 parts.
NULL Gesture
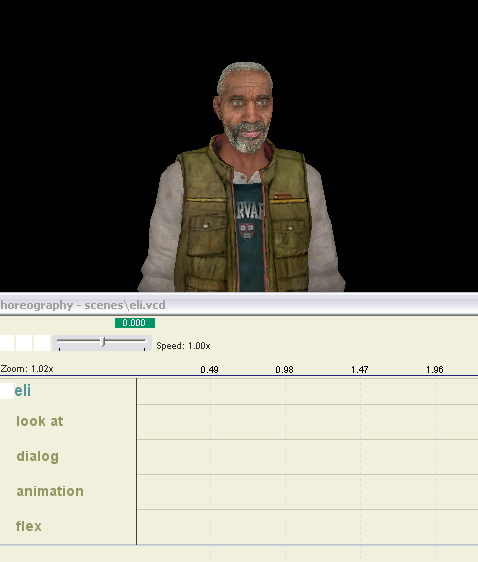
Let's make a new clean scene, with Eli this time :
Before adding any gesture, you need to add a NULL Gesture to prevent bugs with gestures not showing in game :
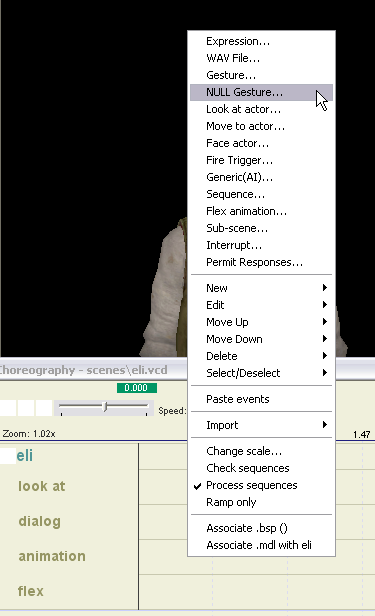
1) Right Click on the timeline of our animation channel (or wathever name you gave it) > NULL Gesture...
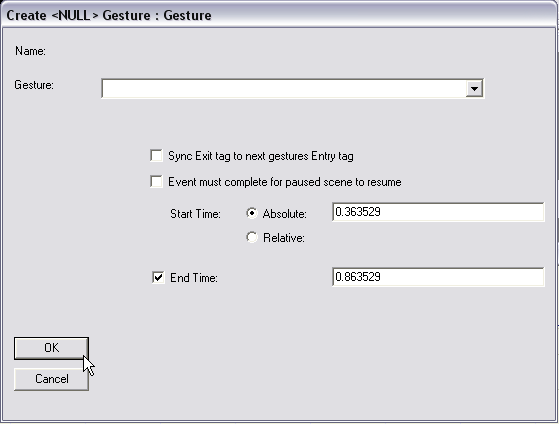
2) Don't change anything, and press "OK".
3) Move your NULL Gesture at the beginning of the channel. The size of the NULL Gesture has no importance, as long as it's the first Gesture of the channel.
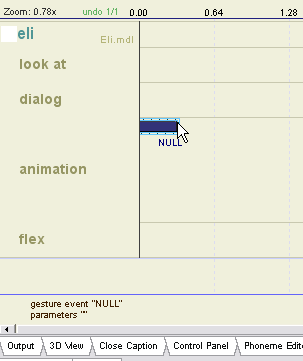
Sweet ! You can now safely add Gestures !
Adding a Gesture
Most logical way to add a Gesture would be to Right Clic on the timeline of our animation channel > Gesture..., but there's a more handy and easier way to do it :
1) Open the Animation tool tab.
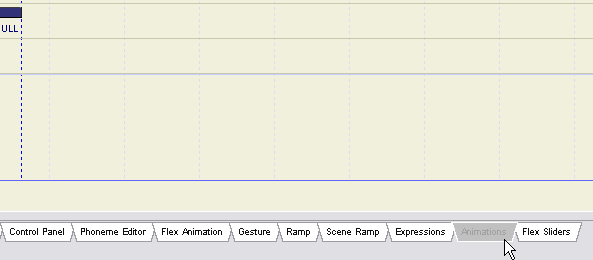
It looks like this :
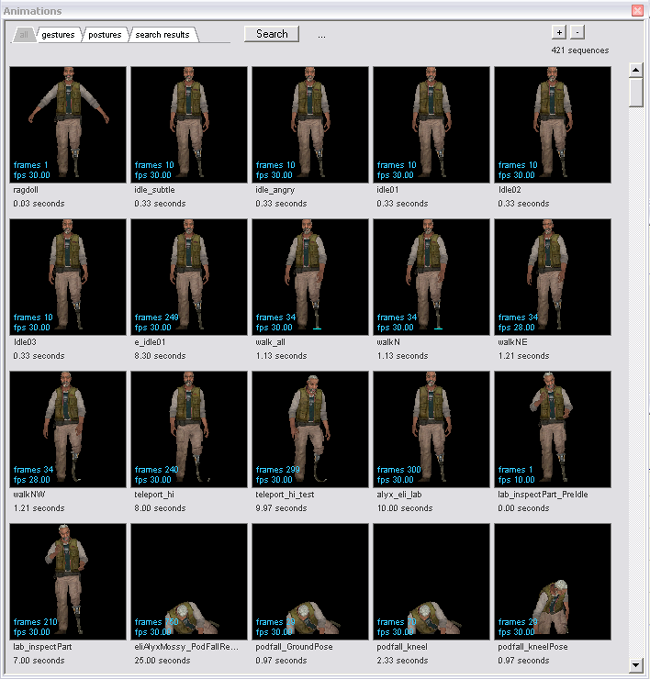
A few words about the Animation window :
- a) All tab contains all animation for the loaded model : Sequences & Gestures.
b) Gestures tab filters all Gestures (obviously).
c) Postures tab filters all... Postures.
d) Search results tab shows the animation fitting your search.
e) Search button allows you to filter animations like Hammer's Materials Browser would do. Remember that one, it's super useful !
Tip : To play an animation in the 3D View : Keep Left Clic pressed on an animation.
For the sake of our example, let's choose the gesture : E_g_rt_sweepout.
2) Drag & Drop the animation into our animation channel.
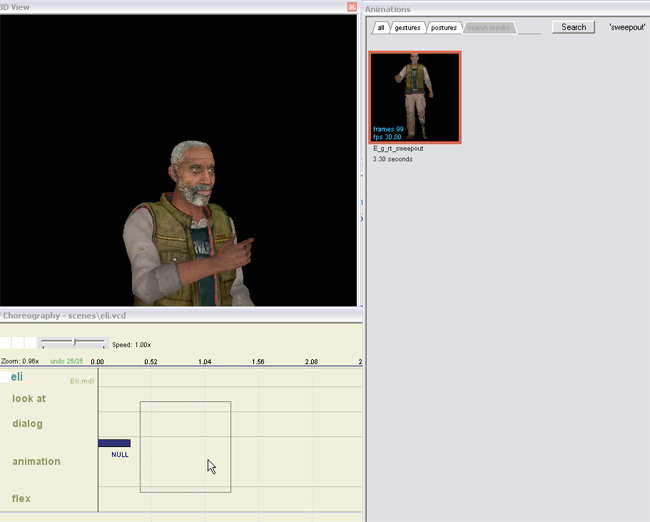
Note : I used the search tool to find the Gesture easily. You better get that reflex too

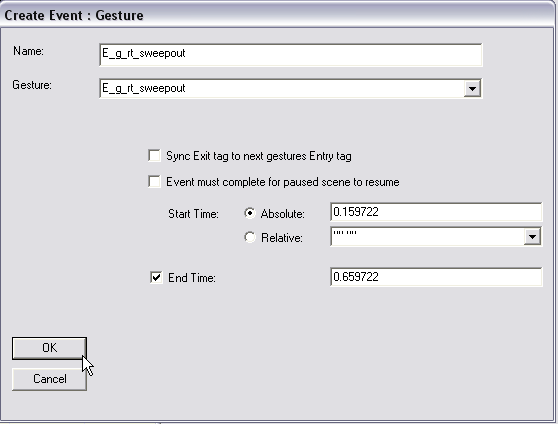
3) Select gesture and press "OK".

4) Name your Gesture and press "OK".
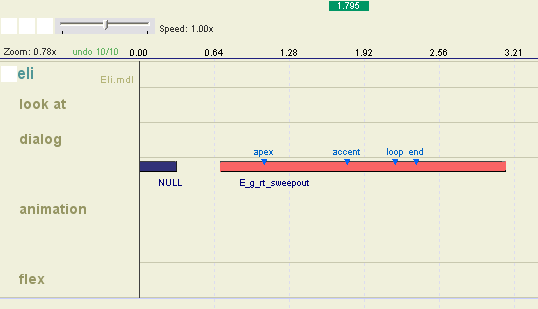
Good job mate ! You have created a Gesture !
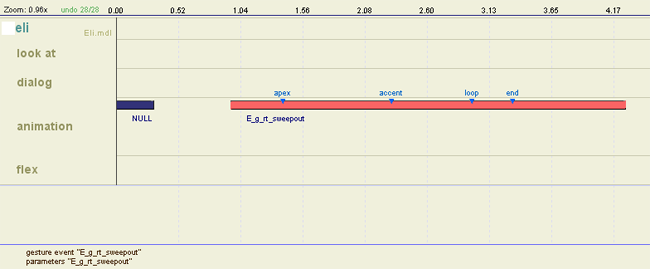
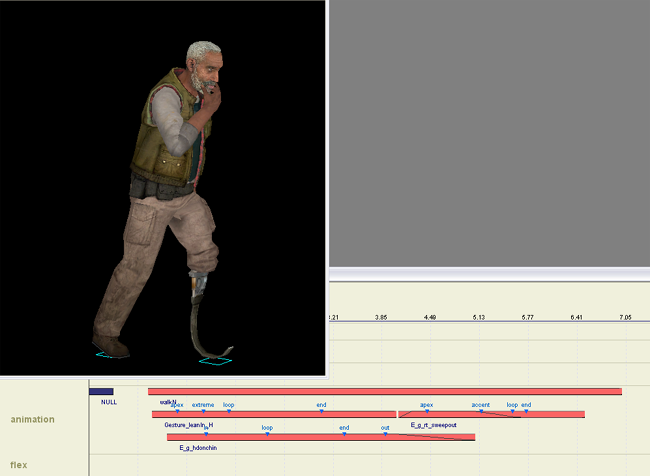
As you can see, the gesture is divided in 5 parts, each starting at a certain "Keyframe" :
- Start of the Gesture : The animation fades in towards its initial position.
Apex : Starts the main animation.
Accent : Ends the main animation & goes into a position that can be looped.
Loop : Starts the part that could be used to loop indefinitely.
End : Starts the fading out of the animation.
Note : These Keyframes don't always have the same name but the structure is always the same : 4 Keyframes, 5 Parts.
Let's take a closer look at these parts...
1) Select your Gesture in the timeline.
2) Double Clic on the "Gesture" tool tab.

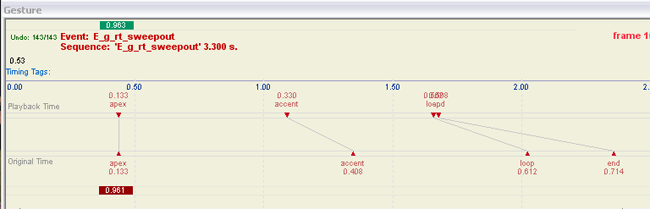
Here's your Gesture window.
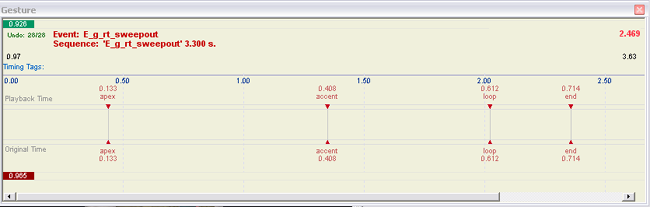
You can clearly see the 4 Keyframes and 5 Parts.
Note : The upper line called "Playback Time" represents the editable Keyframes.
The lower line called "Original Time" represents the default position of the Keyframes, and is used as a reference.
Let's now modify the Gesture to fit our needs.
Editing a Gesture
In this example, I'll make the Apex and End Parts a bit faster (shorter) and almost completely remove the Loop Part :
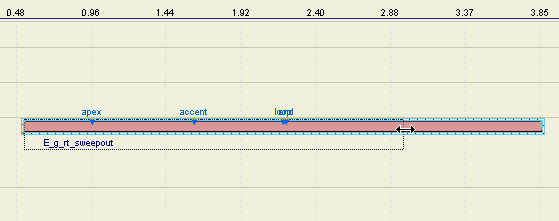
1) Move the Accent Keyframe to the left.
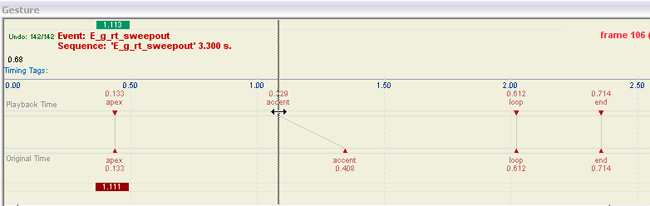
The Apex Part will now play faster and the Accent Part slower.
2) Move the Loop Keyframe to the left, and the End Keyframe right next to it.
The Accent part will now play faster and the Loop part is almost completely gone.
Note : It's possible to delete a Timing tag, but I advice you never delete a default Keyframe as it will always be present in the animation anyway. To delete a Keyframe, just :
- 1) Right Clic on the Keyframe you want to delete > Delete 'nameOfTheKeyframe'...
Note : To create your own Timing tag, just :
- 1) Right Clic on the timeline of the Gesture Window > Insert tag...
2) Name it.
3) Shorten the size of your Gesture in the timeline of the Scene.
Doing so will only change the size of the End Part ;
The End part will now play faster.
4) Check your Gesture and make sure it plays nicely.
Tweak the Keyframes or the size of the Gesture if necessary until you're happy with the result.
And... well done man !
The customised Gesture that you have created is the base from which you'll be making more complex Scenes.
Note : Remember it's also possible to use the Ramp tool (see previous tutorial for more info) with a Gesture to play only specific Parts of a Gesture, for instance.
Blending a Gesture with another Animation
Now that you know how to customise Gestures :
1) Try to add another customised Gesture on top of the one you created.
2) Make them blend using the Ramp Tool if necessary.
3) Maybe even add a third Gesture if needed.
Note : Check the Faceposer Guide Part III if you need help about the Ramp Tool.
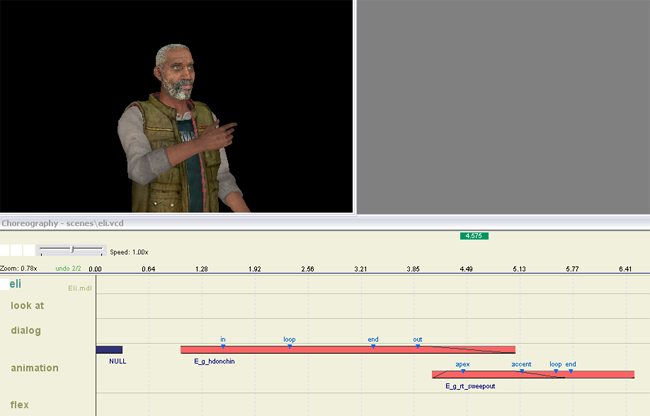
4) In Hammer, play the scene while Eli is walking.
Congratulations !
All these Gestures will blend with each other and create some very personalised animations.
Tweaking Gestures isn't actually very hard. But it really is a core element of Faceposer scenes. So if you understand how Gestures work and how you can blend them with other animations, and if you've figured out the previous Faceposer tutorials, then you probably know the most important things about scene making. And that's great
Next Faceposer Tut' will be about Flex Animations (Face muscles movements), the final touch to Faceposer scenes.
Until then, enjoy and have fun !
Cheers
Kyl'
