General Half-Life 2/Architecture
description
A really good guide on making a realistic broken wall.
keywords
broken, wall, destruction, displacement, displacements.
I know there are already some tutorials covering this topic, but I would like to share my method with everyone. Please note that this tutorial is not for people who are new to mapping. Instead, it is directed towards those with a good base of knowledge in mapping.
Making Advanced Destruction
Part One: Summary
This is what we are basically trying to achieve here. We will be going from this:

To something like this:
We are going to do this by combining brushes, displacements and your creativity.
Making Advanced Destruction
Part Two: The Basics
Now we are going to begin construction.
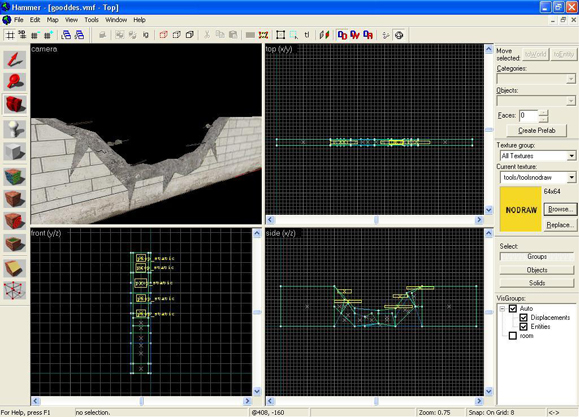
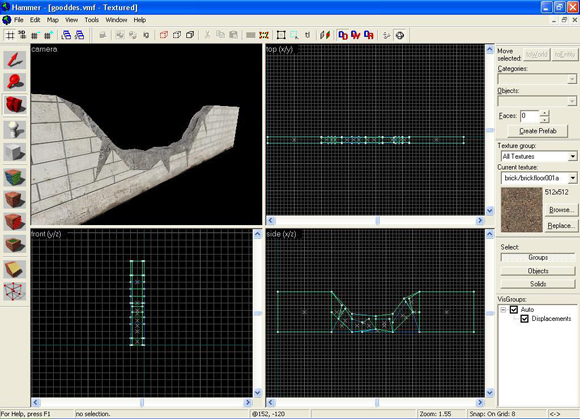
1. Start off by creating an array of brushes in the shape of the debris you want to make. Use the vertex editing tool and line them up or leave some jagged edges. Mine looks like this:
2. Now we are going to add small cuts onto the geometry. I like to do this by creating a small triangular brush and vertex manipulating or clipping existing (or new) brushes to fit around it. This will make the destroyed wall look much cooler. When you complete that process, you should have something similar to this:
Starting to look a lot better already, isn't it? Make all the destruction brushes into detail and let's move on to the next section.
Making Advanced Destruction
Part Three: Displacements
In this section of the tutorial, we are going to use displacements to spruce up our destroyed wall.
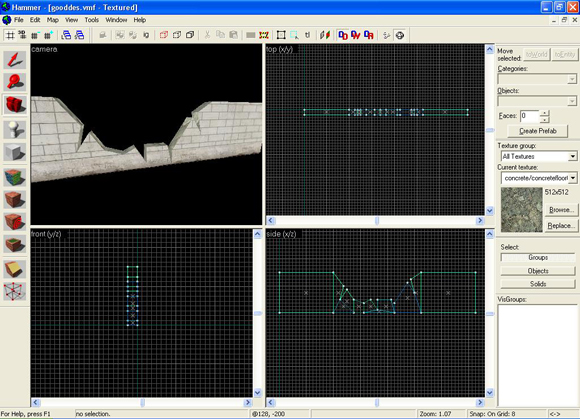
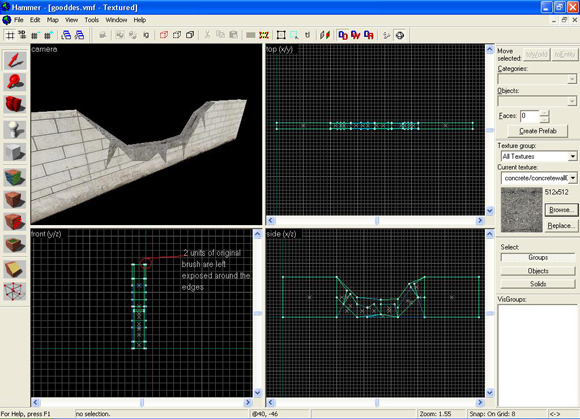
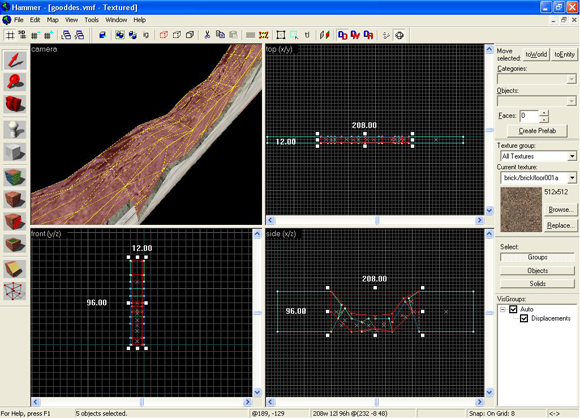
1. Start by creating some brushes that will soon become your displacements. Make sure they completely fill the cuts in our wall. I recommend leaving 1-2 units of the original brush showing. A picture is worth 1000 words, so look at this picture for further explanation:
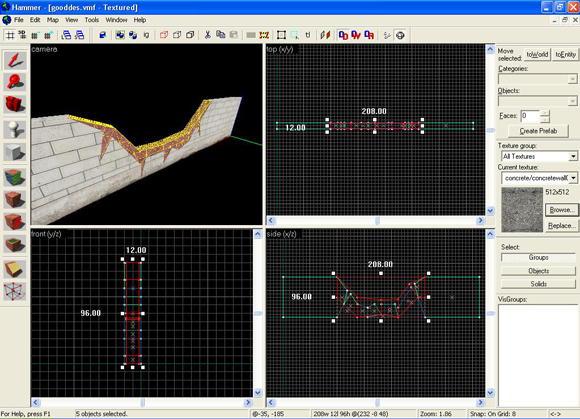
2. Now we are going to create our displacements. You should use the lowest power of 2 because of the small size of the brushes.
3. Let's begin manipulating the vertexes of our displacements. Don't forget to select all of the displacements at once before editing them, because otherwise you might end up with some nasty holes between your displacements. Also make sure that the Auto-Sew button is checked. I am going to use the "Raise To" tool because I want it to be very neat for now. Keep going until you like the shape of them. If you begin to notice texture stretching, try to lower the amount of height variation in the vertexes, in other words, even them out a little. Leave the vertexes on top of the brushes alone for now, I will cover them next.
Looking nice, ain't it?
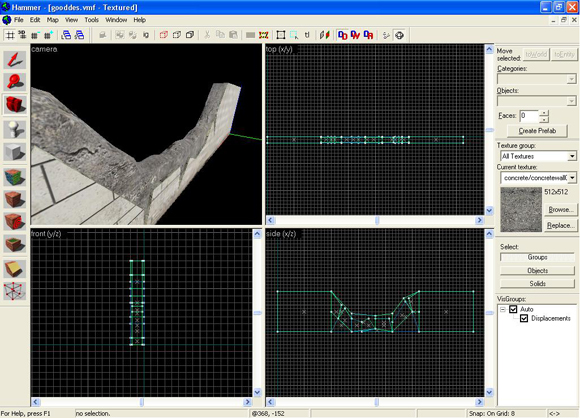
4. Remember those rows of vertexes on the top of our brushes?
Well, we are going to deal with those right now. First, grab the "Raise/Lower" tool for modifying displacements. Change Distance and Radius both to 1. Begin raising the vertexes. If you have steeply slanted displacements in some spots as I do, you should try using the X axis to make it look like they are popping up better. Be careful, undo your mistakes, and you should end up with a nice effect somewhat similar to this:
Now we are pretty much done except if you want to add some more displacements, such as a pile of rubble (which I am not going to do because it may cover up some precious details). Instead, I will add some models.
Making Advanced Destruction
Part Four: Extras
Before I begin here, I want to tell you that this step is completely optional. It is only for those that may want to add some interesting details to their destruction.
1. We are going to start off by simply placing a prop_static right on our wall. In it's properties, browse through world models until you find the props_debris folder. Inside you will find a few rebar models, which are little metal bars sticking out of the wall. Try to keep them varied, and rotate them as necessary.
And now you're done!
This is the final result:
And an in game shot:

AND... the example map file from RapidShare!
b4nny