Modelling
description
Creating cinematic physics, similar to those seen in Half-Life 2 : Episode 2.
keywords
model, models, modelling, cinematic, physics, physic, xsi.
In Half Life 2 Episode 2 Valve incorporated "cinematic physics" into the game, which are simply rigid body, or soft body simulations that are "baked" into an animation to take the load off of your CPU, not actually a feature of the engine. With Cinematic physics, simulations of thousands of rigid bodies are possible with minimal performance impact. Mesh deformations are also possible.
The collapsing bridge and the building being split apart by the strider's beam of doom are examples of cinematic physics.
The simulation that we are making in this tutorial will be simple one, so after you learn the process, I recommend that you read your package's help files to learn about making more complex simulations.
The Simulation
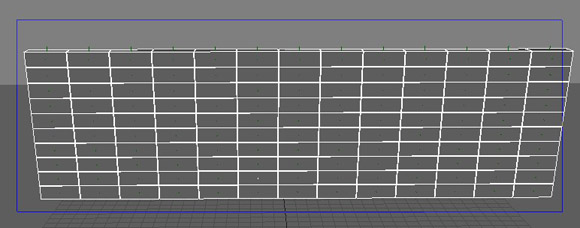
The first one we're going to make will be similar to the building being destroyed in the trailer. We're going to make a brick wall that gets blown up.
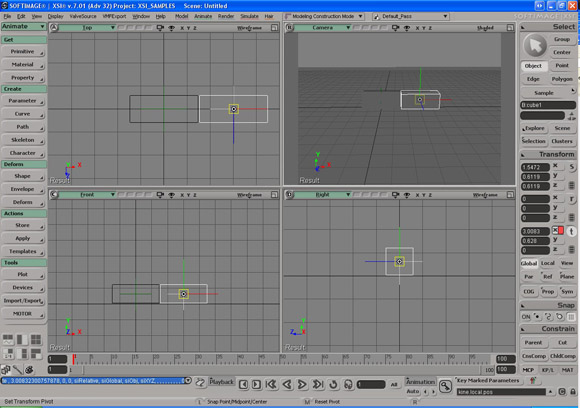
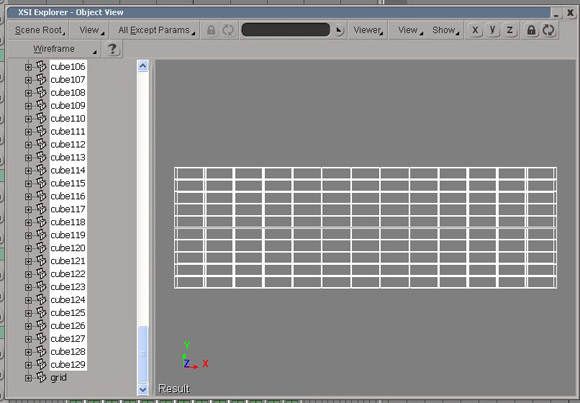
First, make the ground.
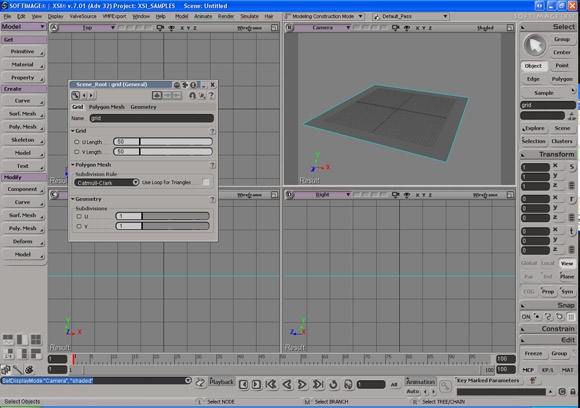
Pretty aint it?
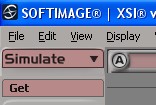
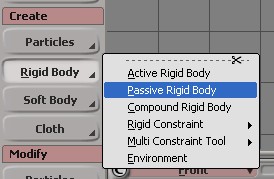
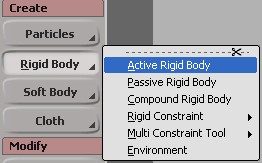
Then make the ground a passive rigid body, by making it passive it means that by default it will collide with other rigid bodies, but it will not be effected by forces, and will not move (unless it's animated) To do this press "4" on your keyboard, or click on this button and set it to simulation.
Then click "rigid body" (under create) and then click passive rigid body. Now you have a physically simulated ground. And I know it's hard to believe, but it gets even more exciting than this.
Now we will make a single brick.
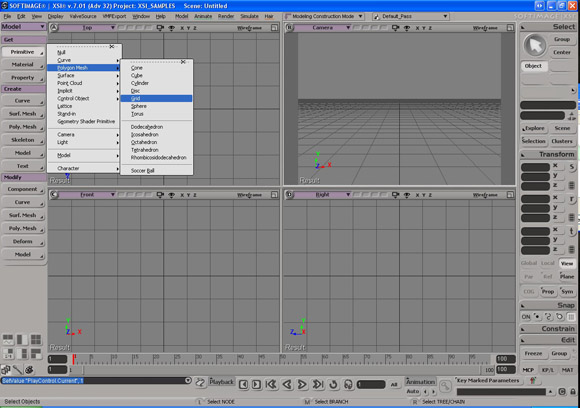
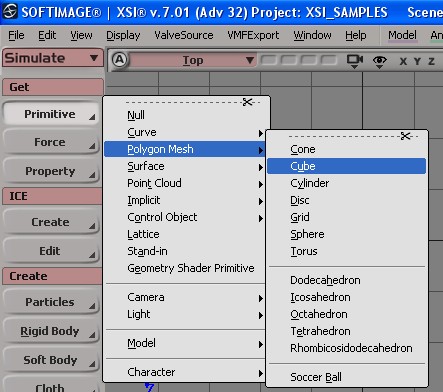
click on "Primitive" under "get" on the left button panel and go to polygon mesh, then "cube".
But bricks aren't usually shaped like cubes, so elongate it a little and raise it above the "ground"

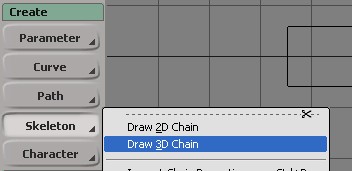
then you'll want to press "2" on your keyboard, and change the menu to "animation.
Under "create" go to "Skeleton" and click "draw 3d chain".
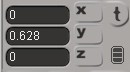
Click anywhere on a viewport and a "null" should appear, then place the null in the center of your brick. (you can just copy the Cartesian coordinates of the brick onto the null to get the positioning exactly right.
Now click on your brick and select "parent" in the lower right hand side of your screen.
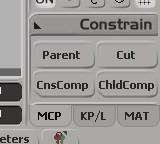
(if your monitor is displaying at a low resolution then you may have to right click on the "constrain" button for "parent" to show up. After you press "parent" click on the newly placed "null" and right click. It won't look like anything happened, but if you move the brick the null should move with it.
ok, now RIGHT CLICK on the brick and press "control+D" on your keyboard then translate the newly created brick over to the right.
then repeat the process until you have the bottom row of bricks completed.
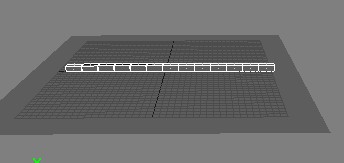
Now RIGHT CLICK and drag over the edge of all your bricks (selection is in blue)
 and press "control+D" again to duplicate, then translate them all upwards, then do it a few more times till you have a wall of bricks.
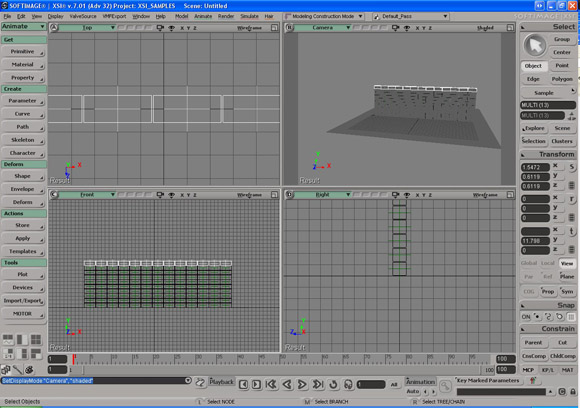
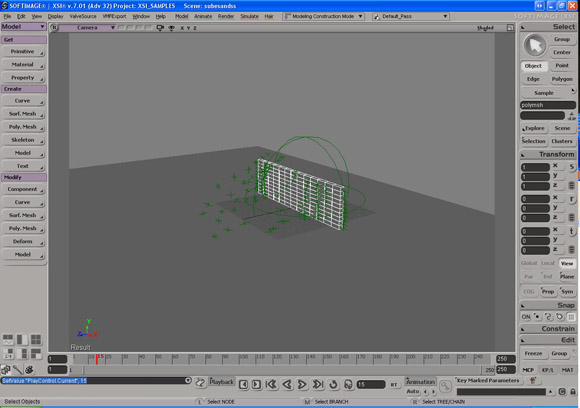
Now press "ALT+8" on your keyboard and the scene explorer should show up.
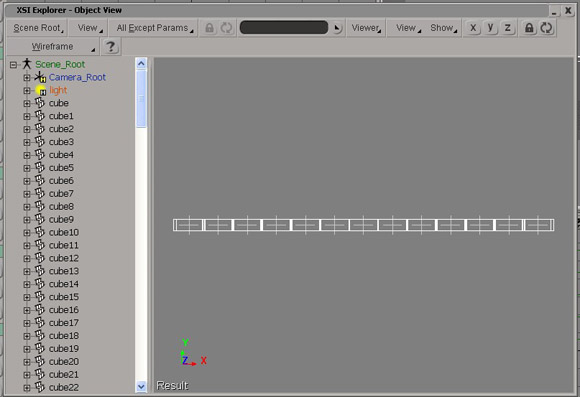
Select all of the cubes (if you click on the first one then hold shift and click on the last one, it'll select all in between)
With all the cubes selected press "4" on your keyboard to get you back into the simulation options then click on "rigid body" again, but this time select active rigid body.
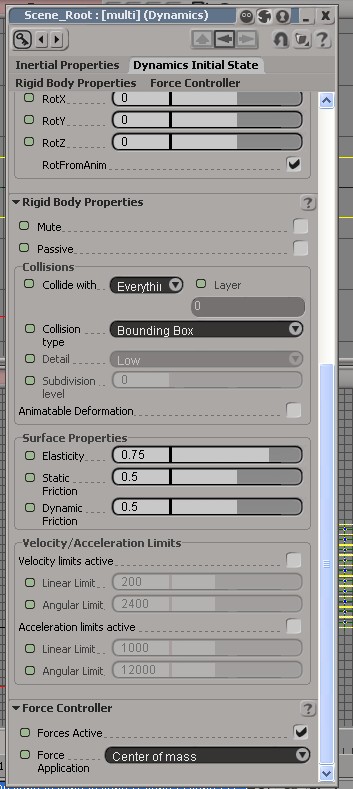
A window should pop up, scroll down till you see a slider with the word "elasticity" next to it, drag this slider down till it's at or close to 0 (you don't want your bricks bouncing like rubber) and set both friction values to something a little higher (you don't want your bricks sliding all over each other) But friction is relatively expensive on a large number of objects, so don't exceed .7 if you want to watch your simulations in real time
Alright, now that you've got active and passive rigid bodies, time to test our simulation! click on the little right facing arrow at the bottom of the screen

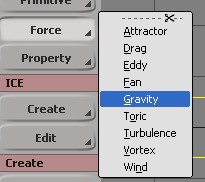
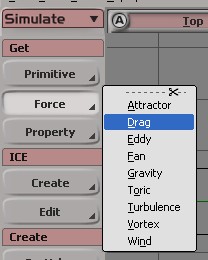
and... Nothing should happen. This wall is floating in outer space, there's no gravity, so now click on "force" under "get" and select "gravity".
A little green gravity icon should appear near the center of your screen, but it's hard to see/select. When you create anything in XSI it's always gets selected by default, so just translate it out of the way so it's easier to see. Now press the arrow! Chances are that the wall is going to compress a little and act like... a wall. If not then don't sweat. Follow the next set of directions. If your simulation is working at this point then ignore the next paragraph!!!!
Hopefully you still have all your bricks selected, if you don't then open scene explorer again and select them all. Now click on "environment" under "modify" and click "apply force" and click on your gravity icon.
Woot.Now you might notice that the simulation is very fast and very short, to fix that look at the number on the right side of the timeline at the bottom of your screen, and change that number to something a lot higher, like 250.

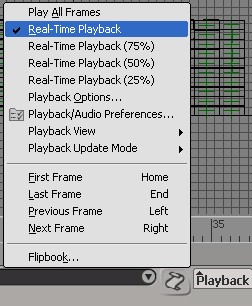
Then click on the "playback" button under the timeline and set it to real time playback. (SAVE BEFORE YOU DO THIS, if your simulation is too intensive for your computer to keep up with it at its playback rate then it'll resimulate the scene over and over and over again until you force quit, if your simulation is too intensive keep it at (play all frames)
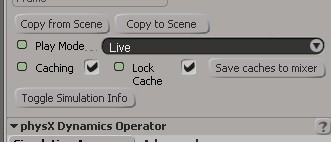
While I'd say it's not really necessary with a simulation this small, it's important that you learn to cache simulations. so click on "rigid body" but this time, click on the one under "modify" and click "edit simulation properties.
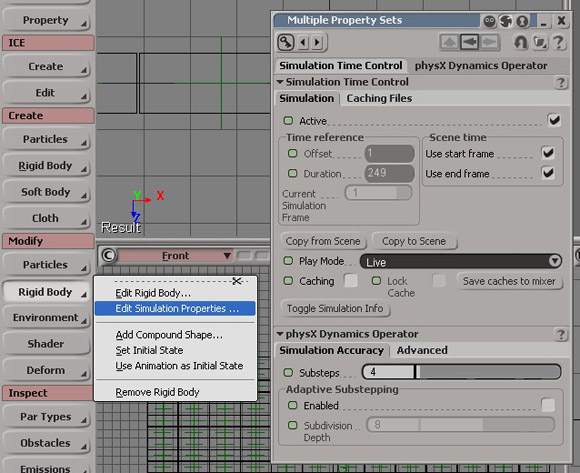
towards the middle of the box that pops up there should be a check box called "caching" check it. What this will do is save the animation once it's simulated once, so if you simulate a really heavy scene, then want to watch it again, you don't have to re-simulate, it also allows you to click and drag on the slider to see the simulation at any point in time. Later you will want to look up the different "playback modes" in the help files to help you figure out which you will want to use later, but for now we can stick with whatever the default is. A little lower on the box you'll notice a simulation substepping slider, that's basically an "accuracy" slider, the higher it is the more calculations it will do during the simulation. for the over the top explosion kinda simulations we're doing, it doesn't need to be very accurate, so keep it default as well.
But now back to the simulation. You bricks will probably be swaying around or falling over or something ghetto, without you even having to touch them, that's fine.
It makes no sense to have a static wall be animated, so most of the time this wall be playing the "idle" animation in game, which is just the first frame on loop at 1 fps
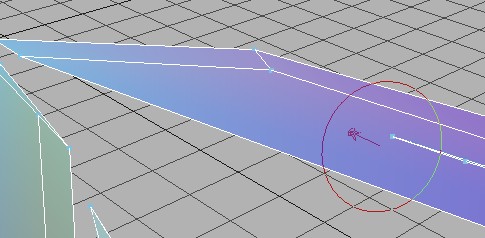
But now for the explosion. Go to "forces" again, under "get" and select "attractor" (drag is highlighted because I'm an idiot, ignore it, press attractor)
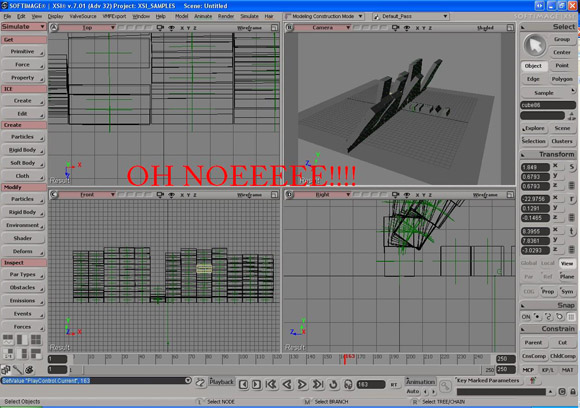
 a sphere should spawn, and a menu should pop up. in the menu set the amplitude to something crazy high (to mimic an explosion) I went with 40,000. then increase the range a little, I went with 20. Next you'll want to move the force to be slightly behind the wall, and close to the ground. you should get something a little like this
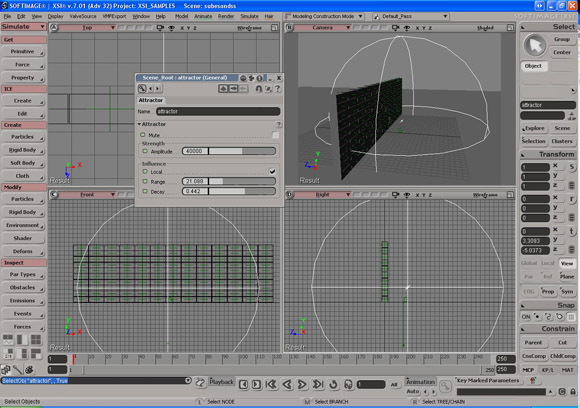
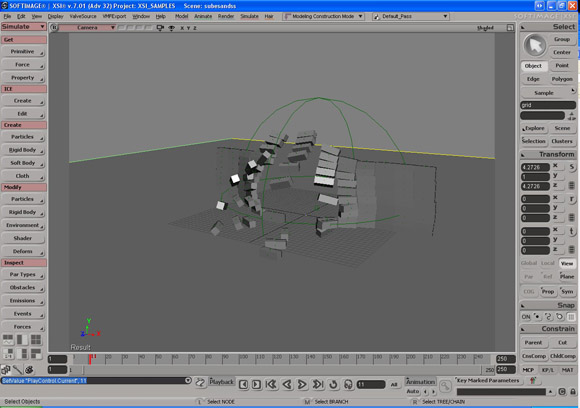
Because of things like friction with the ground, as well as other bricks, and simulated mass, the explosion may or may not look realistic, that's something that you'll get better with later. (for a quick fix you can select all your bricks press "Alt+enter" and look for a box where you can enter "mass" then you can increase the amplitude of your explosion, or you can click on the ground and press "alt+enter" and raise the dynamic and static friction.)
Preparing For Source
But this animation isn't ready for the source engine yet, once you're happy with your results go back to the "edit simulation properties" window and press "lock cache"
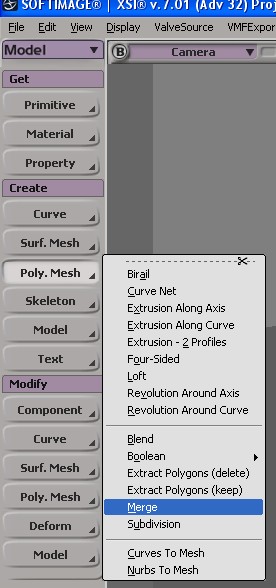
Now you should go into the scene explorer (alt+8) and select all your cubes one more time. After that press "1" on your keyboard to put you in the modeling layout and scroll down to "poly. Mesh" under "create" then select "merge".
A window should pop up, and you should drag the "tolerance" slider to the left then click the "delete" button. (I'm serious)

Now drag the timeline slider around. UH OH! the bricks aren't moving anymore, but the bones still are.
Now we have to find a way to connect the polygons to these bones. Well first you'll want to delete your "attractor" and your "gravity" because nothing is being simulated anymore, so they're just taking up space. then you'll want to click on your newly formed mesh and press "2" on your keyboard to go to the animation layout.
Select your wall model, then Under "deform" click on "envelope" then click "set envelope"
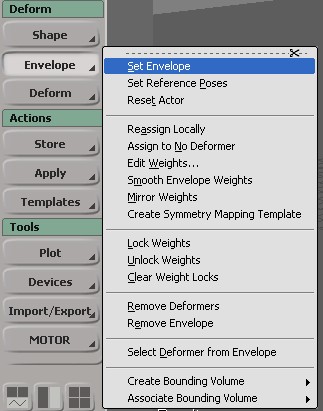
a box should pop up about making the envelope a local operator, select yes (don't worry about figuring out what it does) then click and drag a box over all of your bones and right click.
 There now it should all be enveloped, click the play button and see if everything is alright. In most situations everything will be alright, but sometimes you can get some ugly stretching.
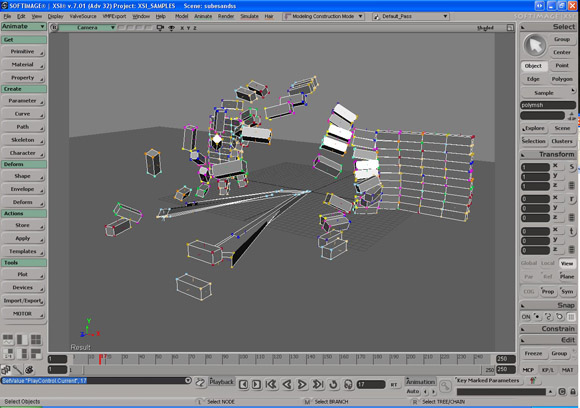
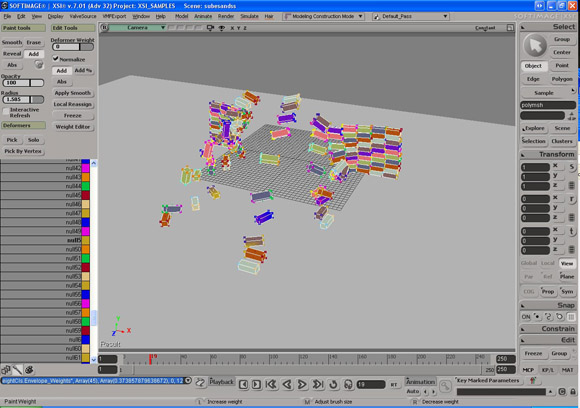
To fix the stretching you should click on the "weight panel" button in the lower right, it looks like a paintbrush, and something like this should show up on the left side of the screen.
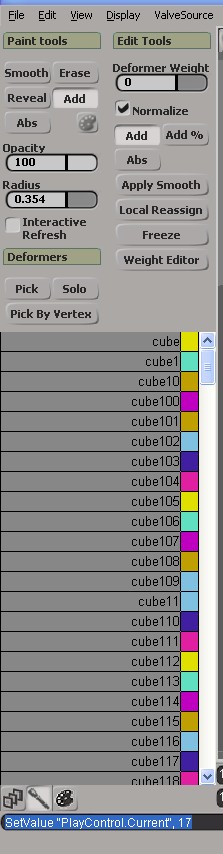
If you don't have all the colors and cubes listed then you need to have the model selected.
now you should lower the radius of your paintbrush. and scroll forward in the simulation so that the bones are far apart and easy to see which objects are causing problems. click on a null that is causing problems for you and look in the upper right to see what number it is,
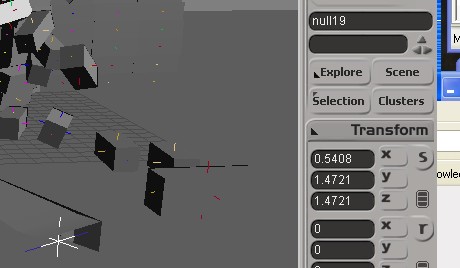
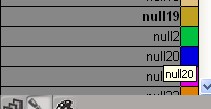
then on the weight panel select that bone (bones are listed in an odd numerical order, null 165 will be listed before null 15 because the numerical value isn't what counts, it's the order in which the numbers appear, it's like alphabetical order, but with numbers). In my case it's "null19" that's messing up.
With your model still selected press "w" on your keyboard and click on the vertexes that are far away from the bone (be careful to only get the vertexes associated with that bone. There, now that bone is all fixed up, repeat this step with all the bones that are messed up (you'll get quick at it, don't worry)
There, all fixed up.
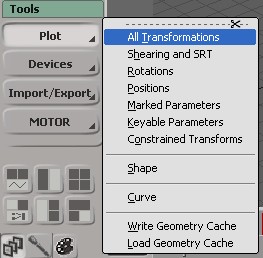
Now to plot the bones open up the scene explorer (alt+8) and select all the bones, then press "2" on the keyboard to get to the animation window. Down under "tools" click on the "plot" button, and then select "all transformations"
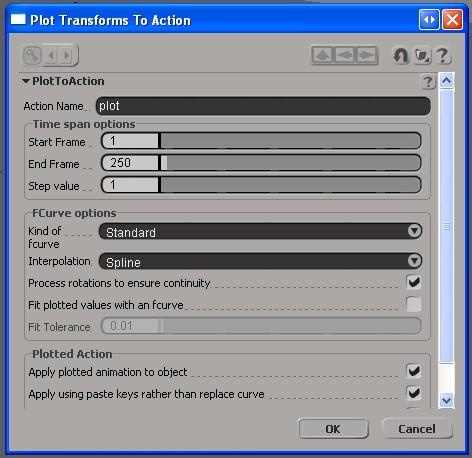
Then this box should show up, just press ok.
Now just export this as a reference model at frame 1, and export a skeletal animation for frames 1-whatever, and lastly export another skeletal animation for it at its final relaxed state, with bricks on the ground and not moving.
Mess Around
Now you can go back and mess with different forces and change the gravity value, or even make more complex structures, like a building made out of individual planks of wood, just remember, always have a bone parented to each model. Also remember the XSI has great documentation on rigid body simulations
Huge Simulations
Sometimes the limits of your own machine, make it hard to plot animations with thousands or tens of thousands of objects, when this is the case, simulate everything, turn down the accuracy, cache it, then save it. After that delete a large section of the bones, and save the new file under a different name, then go back to the original simulation, and delete the section that you didn't delete last time, plus whatever else you want to delete, then save it under a different name. What you're accomplishing is splitting up the simulation but not affecting the already cached motions, if you export and plot all of these separately then it'll be possible to plot more objects than your computer is capable of doing at one time. Valve splits up all of their simulations that have many objects.
Coming Soon
The next tutorial will be on soft body simulations, like the collapsing bridge. And even though I tried very hard to keep things palatable, I'm sure I botched a description somewhere, or omitted a step that is just second nature, so if anyone has any problems following this, let me know.
Stoopdapoop