General Half-Life 2/Architecture
description
Using displacements to create curved road effects.
keywords
roads, terrain, curved roads, displacements, ramps, ground, curves, advanced, arch, ramp, vertex.
First, I'll clarify on what this tutorial is to be used for. Curved roads, in most cases, should be made of displacements. But when the curve must move up or down vertically while curving, this is the best way to do it.

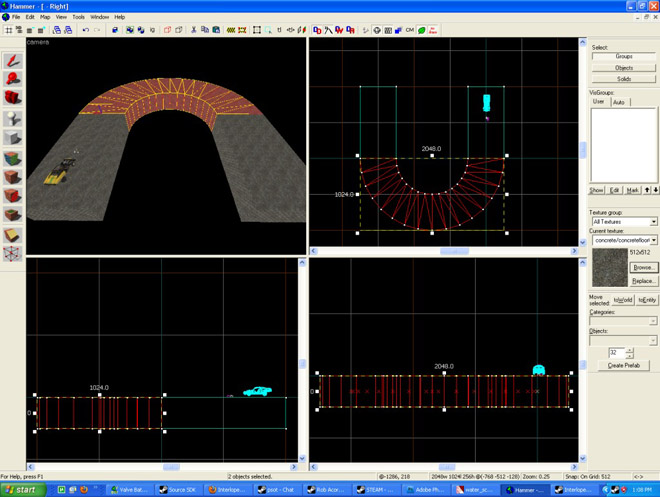
Ok, I made a tutorial to show the right way to do roads like the ones in the above picture. The problem with using displacements for this is that the two end points can't lie on the same plane as the roads attached to the ramp, meaning no sewing. It is possible to do this with displacements, but you'll end up with cracks and seams and messiness somewhere along the line. So here is how to do it cleanly with brushes:

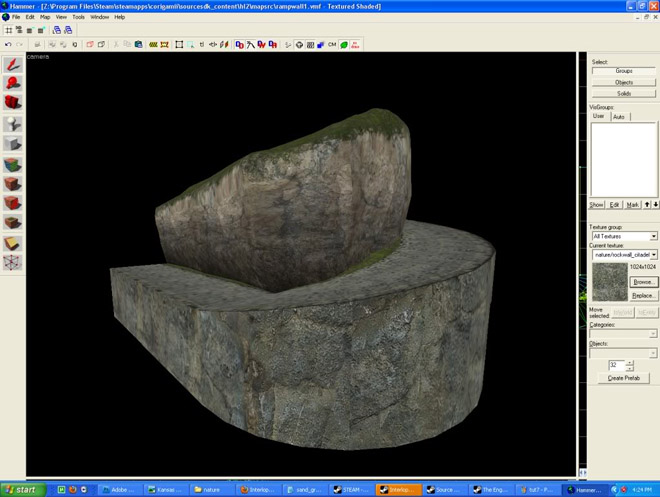
Make an arch, roads are 512 units wide usually but I made this road 256. I used 1024x1024, any power of 2 will be ok. My arch is made up of 32 brushes.

Clip the arch in half.

Clip every rectangular brush into triangles like so.

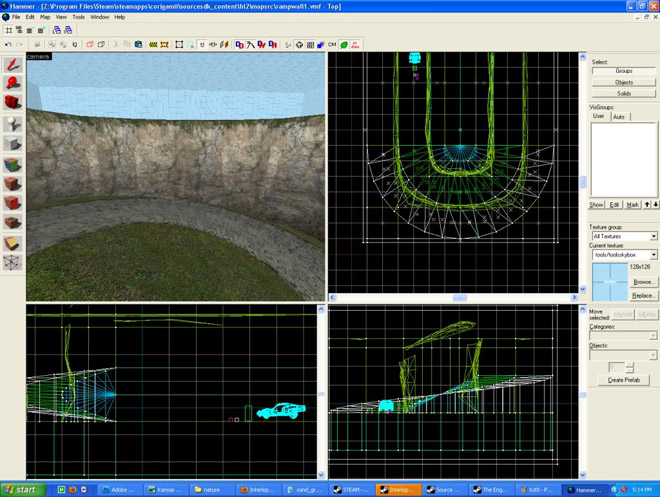
Get out the vertex tool and select the first 2 points of the arch using the TOP view. You HAVE to drag and drop to make a box around each square, then hit enter to select it. Hold control to do this multiple times. If you don't do this, you will miss some points because more than 1 brush will have a corner lying on that point.

Move the TOP 2 selected vertices down to where you want the ramp to start.

Now find out how long the distance is between the top of the ramp and the bottom of the ramp is. Mine is 512. Divide that number by the the number of brushes your arch was made up of, in my case 32. 512/32=8. The number you get, in my case 8, is the distance between each level of brushes. Select the next 2 points and move them so they are 8 units above the first set (in my case, of course). The next pair of points will be 8 units above the previous as well, so they'll be 16 units above the start of the ramp. In the screen shot above, I've got 3 pairs of points done. Do all of them so you end up with this:

Here's the finished ramp. You may want to clip the bottom off where the curve starts. To texture it, you'll have to do the rotations by hand for each face and then select them all and align them to the left. STOP CRYING AND POUNDING YOUR FISTS ON THE KEYBOARD, IT'S NOT THAT BAD. I textured and completed this little scene while I was uploading the pictures for the tutorial:

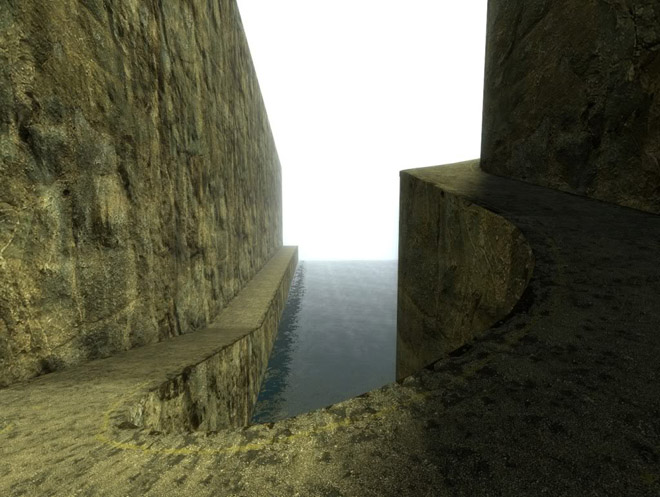
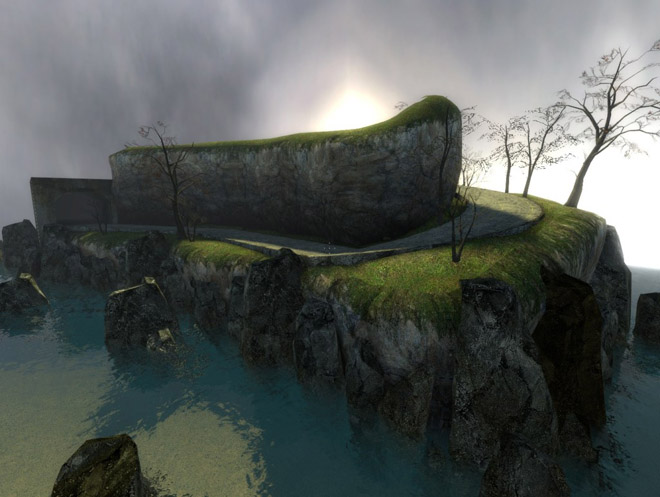
As you can see, lots o' potential for mountainous winding roads.Whatever you do, just MAKE SURE YOU TURN YOUR RAMPS INTO FUNC_DETAILS.
Now, as for adding the cliffs. In the screen shot above, they are brushes and they are ugly. For seamless displacement cliffs, you'll need to:

Start with your ramp. Put a cylinder in the middle that meets all the inside sides of your ramp.

Clip the cylinder in half, then clip from the center of the cylinder to every point on the outside of the cylinder. I also moved the cylinder up a bit.

Using the vertex tool in the top view port, select the outside points of the cylinder one by one and drag them down to match the ramp. When you're done, move the point in the center of the cylinder to half way between the first and last point on the ramp.

Finished! Now clip off the bottom of that mess and TURN IT INTO A FUNC_DETAIL. You now have ground by the road that will prevent seams from forming while you make displacements. Without them, you'd have to push all the displacements into the road to avoid seams. As an alternative, you could just use a displacement and fine tune it to about where the cylinder is now. You won't be able to sew it though, so this won't work in all situations.

Block out your displacements. If you don't know how to do this, take a look at some displacement tutorials on the website. In particular:
http://www.interlopers.net/tutorials/30687
http://www.interlopers.net/tutorials/16891

Subdivide.
Shape your displacements until they look nice and swell.
NOW, this is all well and good for cliffs on the inside of the curve but what if we needed them on the other side of the road? Basically you would do the exact same thing, but instead of using a spiraling cone to cover the seams, you would use another ramp that fits around the outside of your road. Here's how that would look:

The alternative to using brushes, like I mentioned earlier, would be to use displacements under the road and aligning them by hand. Both methods will work in certain situations. Displacements are the better choice when you need to have terrain on the side of the road. Here's how to use displacements for ground under a curved ramp:

Block out the displacements. The six faces on top are the only ones you need, I added the rest for cliffs.

Subdivide. The ground won't be level with the road.

Now the dirty work. Paint your geometry so the displacement sit a little below the road all the way up the ramp.
By request, I'm adding this section on banking roads. It seems like something that would be fairly easy to do with the information above, but there are a few problems you'll come across unless you know what you're doing.
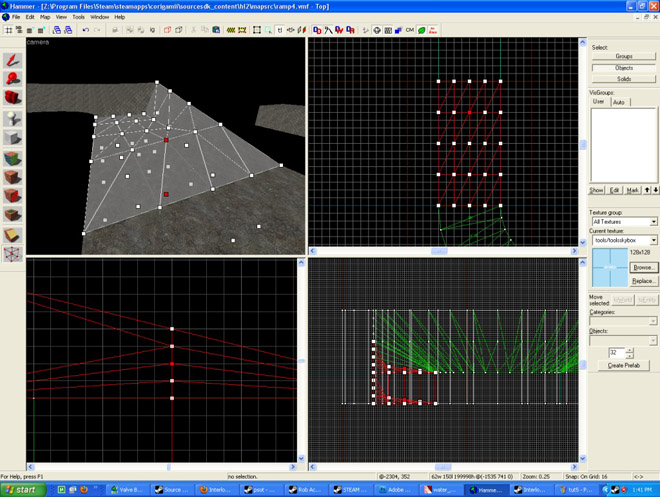
Start out with a triangulated arch, just like everything else we've looked at.
Using ctrl + drag and drop select all the vertices around the outer edge of your road and raise them to make however steep of a bank you want (but PLEASE keep it on a power of 2 or things will get very messy later on)

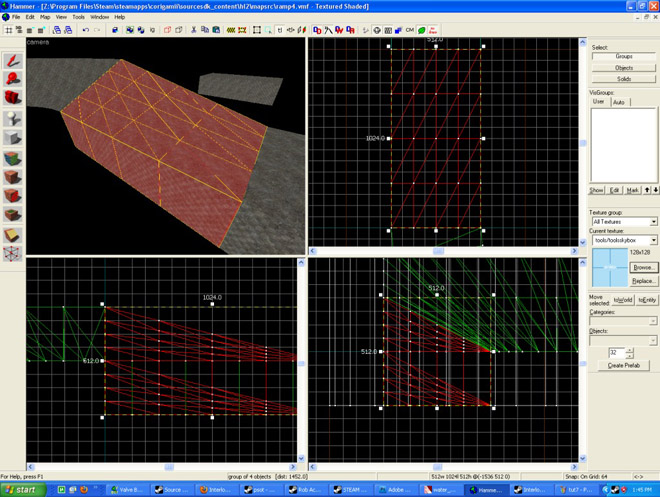
The banking road is done, but unless you're making a banking circle you will need to make a transition from a flat road to the banking road. This is where it gets tricky.
Make a UNIFORM 4x4 grid of brushes in the shape you want your transition piece to be. Using the vertex tool, move the outermost points into a slope like this going from the flat road to the top of the banking road:

Now we have one column of the points finished, but we will now be working in rows. The first row that is touching the flat road will be flat. The second row from the flat road needs to be raised into a slope that goes from the first point (on the right in my screenshot) to the far left point which is already raised. To do this, you need to adjust your grid using the bracket keys so that each unit on the grid is one fourth of the height of the far right point on the row. This means if the far right point is raised 32 units up, you will work on a grid of 8. Select the point 2nd from the left and move it up 8 units (in this case) and then select the point 3rd from right and move it up 16 units and so on. You should now have a slope going up the far left column and another slope intersecting the first like this:
On to the third row. This one is a bit trickier, because you need to move each point up an amount that is a multiple of three. All you need to do is adjust the grid so there are 12 grid units between the first and last point on the row's slope. Now you'll move the second point from the left up 3 grid units and the third from the left up 6 grid units, then move the fourth up 9 grid units.

Finish off the fourth row and you are done.

-Corey Androski