Part 3 - Vents
This is not so much a tutorial, but more a guide to adding detail, and hopefully helps get your creative juices going so you can create your own variety and style. Let’s get started.
Vents
Adding vents to detail your map is an old trick from the original HL. VALVe put vents nearly everywhere (never mind the miles and miles of vents you had to crawl through). Vents add realism to your maps, and a little bit of interest to your ceilings. There are some really good vent props included with HL2, but sometimes they don’t fit your situation, or just plain don’t fit, so it’s handy to know how to make them out of brushes.
In this example, I’m going to make a long S bend vent for my ceiling, and combine it with some of the vent props to make it look good.
To get started, create a block about 256x36x36 and texture it with metalwall045a. Apply it with a scale of 0.13 on both the x and y, and then align it properly.
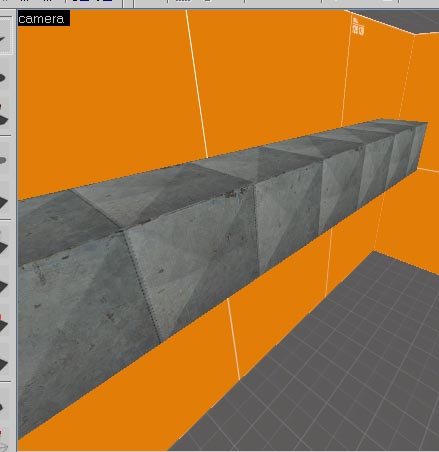
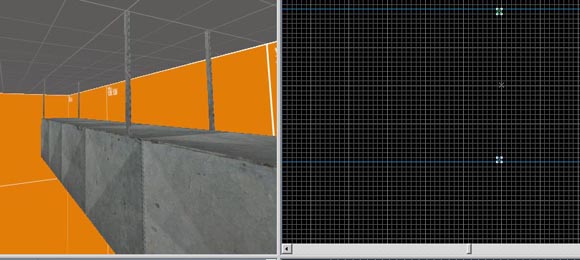
Now that is all well and good, but we need some way for it to stay in position. Go ahead and some 1x1 ceiling supports:
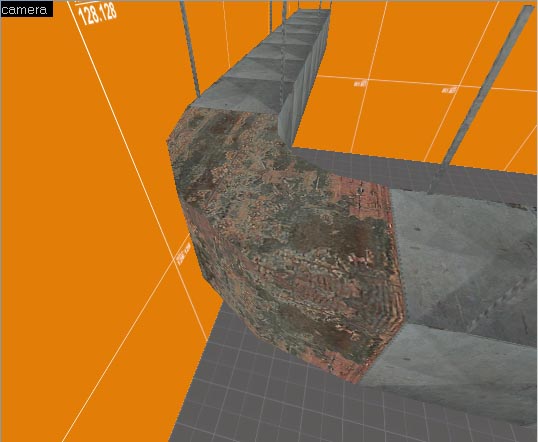
That’s the easy bit, now we need to add some curved corners to this vent. Firstly, clone the vent and rotate it 90°. Now place this cloned vent so that the area between the ends of the two vents is square. That’s a daft explanation, so check the screenshot to see what I mean:
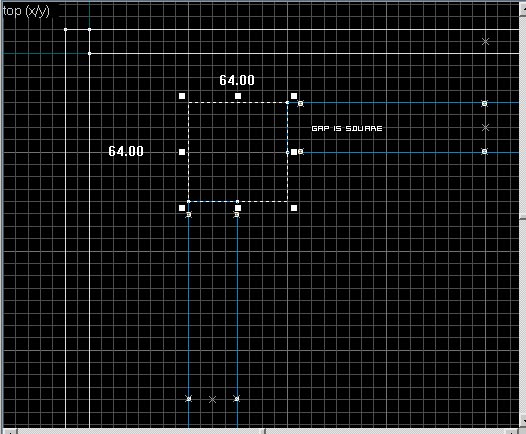
As you can see, you can fill the gap with a square block in the top view. Now we need to make the curve. To do this, sketch out an arch like above, and then double the length of each side in the top view. So in this example it would be 128x128. If the gap had a 32^2 gap in the middle, you would double that so it was 64^2. Now press enter and use these settings:
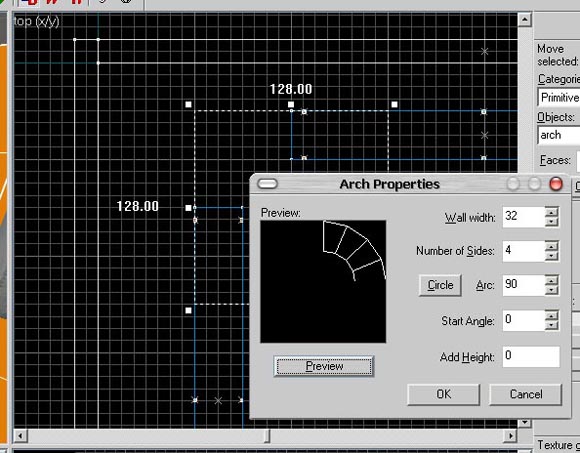
Then click OK. You should now have a nice smooth 90 curve. All that’s left to do now is align it and you’re done. Follow the same process for the other end.
Final Touches
To make the vent section even more interesting you can add prop sections on to it. For example, I’ve added the models/props_vents/vent_medium_grill001.mdl model to mine, to make it look more realistic.
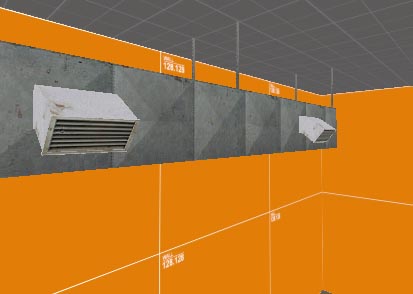
Now you can add an env_steam coming from one of those grills to make it look spiffy.
That’s it, try adding a mixture of brush based vents and models to your levels to get the best effect.
Notes
• Remember the original HL lab levels? There was always some sort of vent detailing in the ceiling. Nifty lighting was also used to improve the scene, for example a small red status light would be up in ceiling with the vents and pipes, etc just to give the scene a bit more comprehensiveness-ness.
• Func_detail your vent sections or I’ll set your face on fire.
• Texture wise, It’s a bitch to try and align the vent texture to you’re curves, which is why I use a generic metal texture on them that fits the theme of the map there in. VALVe do this in there maps, too, as you can see in dm_lockdown, and the models have a whitish metal texture. N.B. the vent models have 3 different skins, so mix it up a bit.
Next part: Pillars. Coming soon.
matteh